O.K. This is part II of D.I.Y. fashion blogging. In part I, we looked at the reasons for writing a blog, what to focus on, and monetization. Part II is going to be about how to put a blog together. Now, we're not going to get into the nitty gritty details of programming a website. So, in this part we're going to assume you already have a platform to launch your blog on, and need to organize the content.
Probably the first choice to make is, given the content you want to share with the general public, what's going to be the overall look of your blog. It's an important first step, and I think a wise choice would be to give your blog an overall feel that harmonizes with the styles you're going to be writing about. If you're primarily going to be writing about shopping and what you can buy online or in stores, maybe some sort of store motif would be best. If you're writing about a particular style of fashion, let's say minimalist, give your blog a, say, minimalist look. You can also subdivide the blog into different pages and give each page a special feel to it depending upon what's that page about, and give the whole blog a look that captures your blogging overall. That would be very cool. One problem: sometimes if the theme harmonizes too much it can get too cute or cloying; like the shopping/store blog equals store motif; maybe that's a bad equation. I've seen quite a few minimalist blogs and all of them have the minimalist theme, so apparently, that's the way to go with those blogs.
Alrighty. Now let's talk a wee bit about writing your blog. At some point you may or may not want to write something. If you don't have photos, and don't have anything written, what else is there? Not much, just a blog theme. On the other hand you may want mostly photos, with little or no explanation. Many minimalist blogs are like that. You'll notice, here at Naomi's Fashionable World, some of these posts can get down right verbose. If that's going to be your choice too, here's some hints about what I'm doing and how it may help. Basically, for Naomi's Fashionable World, I've adopted a style of writing that could be typified as conversational. You'll note, I often use the second person pronoun, like at the beginning of this sentence. The reason for that, is that it helps draw you, the blog readers, into the blog, and hopefully helps start a conversation. It helps to engage the blog audience, plus, it doesn't seem as formal or business like. Since this blog is a personal blog, and I am neither selling, nor promoting, anything (usually), it's O.K. I think, to try and get one-on-one with my audience. You might be thinking: "Hey! Naomi! Is that going to attract a lot of trolling too?" It might, but, so far, here at Naomi's Fashionable World, not many trolls, nor, has trying to engage the audience brought out a stupendous number of comments. It might have backfired, in the sense that it has intimidated people. But you know, people don't have to leave a comment to feel engaged, and that's what I'm trying to achieve here.
Another thing you'll note, is that I sometimes throw a 10 buck word in there now and again, which might seem out of whack with some of the more down homey phrases, like the one I just wrote. It's still cool, I think, just trying to show off my college smarts.
You've probably observed as well, that sometimes my grammar seems off the mark, or maybe not what 'The Chicago Book of Style' is hawking. That's all part of the conversational style: we don't always speak grammatically, yet, we still understand each other! Besides, who made you guys king, Chicago Book of Style? Some of the best writers that have ever lived wrote beautiful, ungrammatical, sentences, that make perfect sense. The other reason for my style of writing, is that I try to break the sentences into bite sized chunks. The reason: there are many people in the world, who don't speak English! I hope the shortened sentence fragments, will help with computer translation. Heck, I can't translate this stuff into every language! One downside: sometimes American colloquialisms can be untranslatable.
On the flip side, I wouldn't write a paper for one of my college courses in this style of writing.
So, maybe you're scratching your head, thinking, "what's this got to do with me?" Well, plenty. That's because many, many popular magazines have articles written in a similar fashion. A great author said once: "great writing comes from great ideas." No matter what style of writing you choose, let your enthusiasm guide your writing, and you'll never miss the mark. Hopefully. If it begins to look like, well, maybe writing isn't your cup of tea, just keep things short and sweet.
Next: photos. They say a picture is worth a thousand words, and that saying is never so true as it is in fashion. Fashion is, literally, all about how people look. And what's the best way to describe that, well, with a photo of course! You might not be doing the modeling yourself, or have a model for the styles you're writing about, so, in that case you'll need some one else's photos. Like, for example, photos like these:


It's probably best to link to the original source to avoid copyright issues. The down side to that, is that many, if not most, of those links are impermanent. Also, you might not be able to link to them at all. Wherever you get your photos, pick ones that are unique, and, at the same time engaging.
I had a Summer internship at an ad agency, that gave me huge insights into both fashion, and web design. Yep. Ad agencies do a surprising amount of web design. Besides that, they are also responsible for many shoots. Now, I'm not talking about just the big full page, glossy, mag ads, ad agencies do many fashion mag features themselves. Usually the procedure works as follows: someone, a magazine, or an apparel company, approaches an agency on working on some promotional, or other kind, project for them. They've sketched the outline of what they want, maybe they even have the models picked out. The ad agency forms a project group: an art director, a copy writer, a graphic artist, and maybe a photographer, and a couple interns, like myself, for instance. They throw around a few ideas, bounce them off the client, the client gives one of the ideas the go ahead. Now, look at these photos:


 They've all got something in common: did I hear photoshop? If I did you'd be correct. The one at the bottom is pretty obvious. The one at the top: not so much. The thing is, practically everything you see on the web these days has, in some way been photoshoped. In the old days, it was called "retouching" or "airbrushing". Why am I bringing this up? Well, there's something to be learned here from ad agencies, and how they make these pictures that are so stunning. The reasons for photoshopping are in some cases practical, and, in others, well, practical: in the last photo; the modeling agency wouldn't want their models exposed to a car burning down, and, getting the fire to look just right is tricky.
The most important reasons: cost and control of environment. You've probably seen movies with models being shot "on location" or outdoors. Well, in the real world, it ain't gonna happen, or at least, not very often. In the top photo, the model probably had a runway show in, say, Italy, or France, then after that gig was over, it's time to go to a photographer's studio for a mag photo shoot. So, why didn't that model just fly out to Detroit, wait for the lighting to be just right, maybe a couple days, and do a gazillion takes to get the background kids just right? Well, there's the reason. In a photography studio, there is so much more control over lighting, and other conditions. Also, change some clothes, click, click, and the photo session is over.
So, the ad agency's role in all of this is, once they've gotten the go ahead, is to line up the models, a convenient, professional, photo studio to photograph them in, then, once they've gotten all of this material back, that's when the fun begins. Ad agencies have huge photo libraries, and when I mean huge, I'm not talking in the thousands, I'm talking in the millions of photos. Out of that library, the art director picks a suitable background. Sometimes, the background is picked first, and sent to the photographic studio so they can shoot the model right. For the one at the top, a Detroit street shot was picked, since the story was all about modeling in Detroit. Then the graphic artist on the team gives the lowdown on what can be done to merge these photos. She/he doesn't assemble the photos her/him self, she/he is just on the team to determine what can and can't be done. Next, a graphic artist, very often freelance, is hired, or enlisted, to assemble the shot. Usually, the actual program Photoshop, is not used. Proprietary software, which is extremely expensive, and requires gigundo computer power, is used. Basically, most ad agencies have more computer power than most colleges. If the graphic artist is freelance, she/he usually has to log onto the company's computer to use the program, because it's way to expensive for the average Josephine or Joe to afford.
Once the graphic artist has finished tweaking the different photos together, it results in something called a mechanical. In the old days, the graphic artist had to literally glue all of the different photos together: each one was painstakingly cut out and mounted on a firm, dense, cardboard board. At this stage, computer or not, what the graphic artist has got, is called a mechanical. That's sent to the art director. If the art director likes what she/he sees, she/he instructs the graphic artist to make a layout, the finished product. If not, more mechanicals are made until they get it right. Before the computer, the layout would be photoed, the photo of it would be what goes in the ad or the mag. Nowadays, the digital file is the finished product. Oops, forgot one step: the copywriter's copy needs to be added: old days: each letter was cut out and glued to the cardboard, like those ransom notes or bomb threats you see in movies. Nowadays: they're added on the ole computer.
Other effects are added by the graphic artist. Remember in the old days when, in some films, everything looked blue:


 Of course, Laurence Fishburne didn't dye his hair blue. Well, a similar effect was added to the Alexander McQueen photo, second from the top, in the first set of these photos.
Here's another example of photoshoping:


 Pretty darn obvious.
So, why this long digression into the pro world? I'm just pointing out what's going on, and, that what we see in mags and on the web is very rarely raw, unadultered, photography. It's important to remember when you start your own fashion blog, because, if you do your own modeling or photo shoots, your end product might not compare exactly with the big shots.
Many fashion bloggers take this route:
 It's very popular to use washed out, desaturated, unfocused images. In fact, I submitted some photos to a D.I.Y. fashion website who recommended, basically: "no bright colors, sharp images", pretty much requirements for photos like the ones directly above. Naturally, I found I was getting many complaints. On the website, people could flag photos for all kinds of things, and I was getting flagged pretty much non stop. Thing was, people doing the flagging were doing the same sort of stuff they were flagging about. So, long story short, decided to blow that clam bake.
If you want to follow the rest of the herd, the photo like the one above is the way to go.
Now, since you almost certainly don't have the resources that an ad agency or some similar company has, what can you do? Well, here's what I did:

 In the the first photo, I went to a party, some one took some pics, and some of them looked pretty good. So, I wrote a post about what I was wearing. Second photo, same deal, except I went to a festival. I found this pose works pretty well for me, and I've used it a few times more. Both photos were, well, worked on: added an overlay frame, and there were some color adjustments. Personally, I use an online, internet phot processing program, though not nearly as elaborate as the ones I wrote about earlier. Just because a photo is desaturated and a little fuzzy doesn't make it any less photoshoped: many adjustments can be made right in the camera or phone. Speaking of which, it's probably a good idea to invest in a good digital camera, cell phone photos are probably going to look terrible once they're expanded.
Here's another example:

 Went on two, different, dates to see a movie, pretty much the same pose, and...you know, I don't think I've written a post about the adventure in the last photo, however, look for it in the future. Hey! You're getting sneak peek there.
Another example:
 Another trip to the movie theater, this time in connection with a set I did for Polyvore, and an adorable, funny, frame around the photo. Haven't been doing the frame thing too much lately, might get back into it. Here's another example:
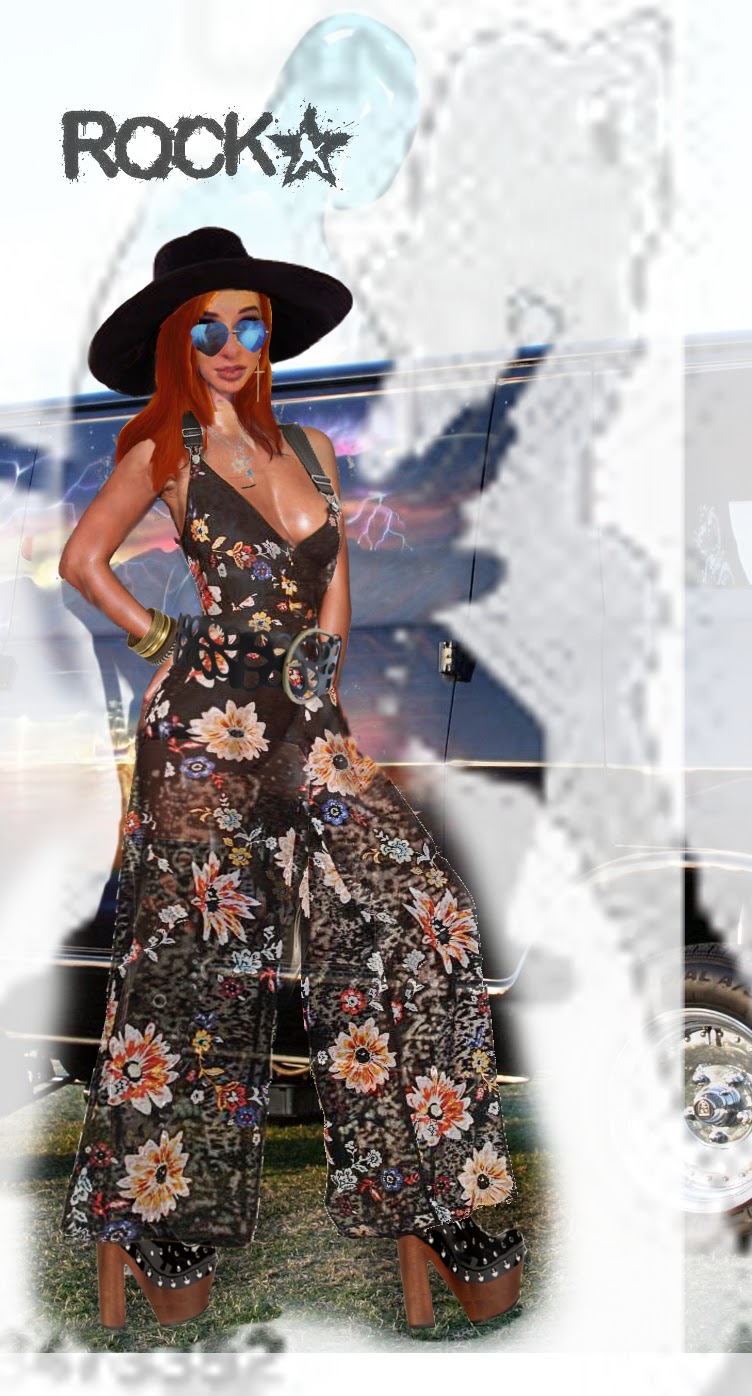
 This time, Spartan Stadium. And, an outfit I created on Polyvore. I like to be more than a clothes horse in my shots, and show a wee bit of personality. I'm not recommending it, just saying what's going on, capiche?
Another example:

 These are from a concert at Detroit's Fillmore; do regret not showing more background, because, it is fascinating, and not just in the fashion fascinator sense.
Lastly, a photo from the dawn of the early days of Naomi's Fashionable World:
 Same idea as the pro Detroit fashion shoots: this one was on location, however, in some of Detroit's ruins, an abandoned school. The reason: so many photos about these ruins, and so much focus on them, I thought I'd get my two cents in there too.
So, there's some ideas, not necessarily, specifically, these ones, just a general idea of going about it.
My advice? Pick out outfits you're enthusiastic about, and find something interesting to do in them, and get some cool shots of yourself ,or your model, doing it.
Guess that's about it for now, maybe a part III will be coming up if I think of more tips.
Anyways, happy blogging!
Catchya later.
Ciao.
Probably the first choice to make is, given the content you want to share with the general public, what's going to be the overall look of your blog. It's an important first step, and I think a wise choice would be to give your blog an overall feel that harmonizes with the styles you're going to be writing about. If you're primarily going to be writing about shopping and what you can buy online or in stores, maybe some sort of store motif would be best. If you're writing about a particular style of fashion, let's say minimalist, give your blog a, say, minimalist look. You can also subdivide the blog into different pages and give each page a special feel to it depending upon what's that page about, and give the whole blog a look that captures your blogging overall. That would be very cool. One problem: sometimes if the theme harmonizes too much it can get too cute or cloying; like the shopping/store blog equals store motif; maybe that's a bad equation. I've seen quite a few minimalist blogs and all of them have the minimalist theme, so apparently, that's the way to go with those blogs.
Alrighty. Now let's talk a wee bit about writing your blog. At some point you may or may not want to write something. If you don't have photos, and don't have anything written, what else is there? Not much, just a blog theme. On the other hand you may want mostly photos, with little or no explanation. Many minimalist blogs are like that. You'll notice, here at Naomi's Fashionable World, some of these posts can get down right verbose. If that's going to be your choice too, here's some hints about what I'm doing and how it may help. Basically, for Naomi's Fashionable World, I've adopted a style of writing that could be typified as conversational. You'll note, I often use the second person pronoun, like at the beginning of this sentence. The reason for that, is that it helps draw you, the blog readers, into the blog, and hopefully helps start a conversation. It helps to engage the blog audience, plus, it doesn't seem as formal or business like. Since this blog is a personal blog, and I am neither selling, nor promoting, anything (usually), it's O.K. I think, to try and get one-on-one with my audience. You might be thinking: "Hey! Naomi! Is that going to attract a lot of trolling too?" It might, but, so far, here at Naomi's Fashionable World, not many trolls, nor, has trying to engage the audience brought out a stupendous number of comments. It might have backfired, in the sense that it has intimidated people. But you know, people don't have to leave a comment to feel engaged, and that's what I'm trying to achieve here.
Another thing you'll note, is that I sometimes throw a 10 buck word in there now and again, which might seem out of whack with some of the more down homey phrases, like the one I just wrote. It's still cool, I think, just trying to show off my college smarts.
You've probably observed as well, that sometimes my grammar seems off the mark, or maybe not what 'The Chicago Book of Style' is hawking. That's all part of the conversational style: we don't always speak grammatically, yet, we still understand each other! Besides, who made you guys king, Chicago Book of Style? Some of the best writers that have ever lived wrote beautiful, ungrammatical, sentences, that make perfect sense. The other reason for my style of writing, is that I try to break the sentences into bite sized chunks. The reason: there are many people in the world, who don't speak English! I hope the shortened sentence fragments, will help with computer translation. Heck, I can't translate this stuff into every language! One downside: sometimes American colloquialisms can be untranslatable.
On the flip side, I wouldn't write a paper for one of my college courses in this style of writing.
So, maybe you're scratching your head, thinking, "what's this got to do with me?" Well, plenty. That's because many, many popular magazines have articles written in a similar fashion. A great author said once: "great writing comes from great ideas." No matter what style of writing you choose, let your enthusiasm guide your writing, and you'll never miss the mark. Hopefully. If it begins to look like, well, maybe writing isn't your cup of tea, just keep things short and sweet.
Next: photos. They say a picture is worth a thousand words, and that saying is never so true as it is in fashion. Fashion is, literally, all about how people look. And what's the best way to describe that, well, with a photo of course! You might not be doing the modeling yourself, or have a model for the styles you're writing about, so, in that case you'll need some one else's photos. Like, for example, photos like these:


It's probably best to link to the original source to avoid copyright issues. The down side to that, is that many, if not most, of those links are impermanent. Also, you might not be able to link to them at all. Wherever you get your photos, pick ones that are unique, and, at the same time engaging.
I had a Summer internship at an ad agency, that gave me huge insights into both fashion, and web design. Yep. Ad agencies do a surprising amount of web design. Besides that, they are also responsible for many shoots. Now, I'm not talking about just the big full page, glossy, mag ads, ad agencies do many fashion mag features themselves. Usually the procedure works as follows: someone, a magazine, or an apparel company, approaches an agency on working on some promotional, or other kind, project for them. They've sketched the outline of what they want, maybe they even have the models picked out. The ad agency forms a project group: an art director, a copy writer, a graphic artist, and maybe a photographer, and a couple interns, like myself, for instance. They throw around a few ideas, bounce them off the client, the client gives one of the ideas the go ahead. Now, look at these photos:


The most important reasons: cost and control of environment. You've probably seen movies with models being shot "on location" or outdoors. Well, in the real world, it ain't gonna happen, or at least, not very often. In the top photo, the model probably had a runway show in, say, Italy, or France, then after that gig was over, it's time to go to a photographer's studio for a mag photo shoot. So, why didn't that model just fly out to Detroit, wait for the lighting to be just right, maybe a couple days, and do a gazillion takes to get the background kids just right? Well, there's the reason. In a photography studio, there is so much more control over lighting, and other conditions. Also, change some clothes, click, click, and the photo session is over.
So, the ad agency's role in all of this is, once they've gotten the go ahead, is to line up the models, a convenient, professional, photo studio to photograph them in, then, once they've gotten all of this material back, that's when the fun begins. Ad agencies have huge photo libraries, and when I mean huge, I'm not talking in the thousands, I'm talking in the millions of photos. Out of that library, the art director picks a suitable background. Sometimes, the background is picked first, and sent to the photographic studio so they can shoot the model right. For the one at the top, a Detroit street shot was picked, since the story was all about modeling in Detroit. Then the graphic artist on the team gives the lowdown on what can be done to merge these photos. She/he doesn't assemble the photos her/him self, she/he is just on the team to determine what can and can't be done. Next, a graphic artist, very often freelance, is hired, or enlisted, to assemble the shot. Usually, the actual program Photoshop, is not used. Proprietary software, which is extremely expensive, and requires gigundo computer power, is used. Basically, most ad agencies have more computer power than most colleges. If the graphic artist is freelance, she/he usually has to log onto the company's computer to use the program, because it's way to expensive for the average Josephine or Joe to afford.
Once the graphic artist has finished tweaking the different photos together, it results in something called a mechanical. In the old days, the graphic artist had to literally glue all of the different photos together: each one was painstakingly cut out and mounted on a firm, dense, cardboard board. At this stage, computer or not, what the graphic artist has got, is called a mechanical. That's sent to the art director. If the art director likes what she/he sees, she/he instructs the graphic artist to make a layout, the finished product. If not, more mechanicals are made until they get it right. Before the computer, the layout would be photoed, the photo of it would be what goes in the ad or the mag. Nowadays, the digital file is the finished product. Oops, forgot one step: the copywriter's copy needs to be added: old days: each letter was cut out and glued to the cardboard, like those ransom notes or bomb threats you see in movies. Nowadays: they're added on the ole computer.
Other effects are added by the graphic artist. Remember in the old days when, in some films, everything looked blue:


Here's another example of photoshoping:
So, why this long digression into the pro world? I'm just pointing out what's going on, and, that what we see in mags and on the web is very rarely raw, unadultered, photography. It's important to remember when you start your own fashion blog, because, if you do your own modeling or photo shoots, your end product might not compare exactly with the big shots.
Many fashion bloggers take this route:

If you want to follow the rest of the herd, the photo like the one above is the way to go.
Now, since you almost certainly don't have the resources that an ad agency or some similar company has, what can you do? Well, here's what I did:

Here's another example:


Another example:


Another example:


Lastly, a photo from the dawn of the early days of Naomi's Fashionable World:

So, there's some ideas, not necessarily, specifically, these ones, just a general idea of going about it.
My advice? Pick out outfits you're enthusiastic about, and find something interesting to do in them, and get some cool shots of yourself ,or your model, doing it.
Guess that's about it for now, maybe a part III will be coming up if I think of more tips.
Anyways, happy blogging!
Catchya later.
Ciao.
No comments:
Post a Comment